
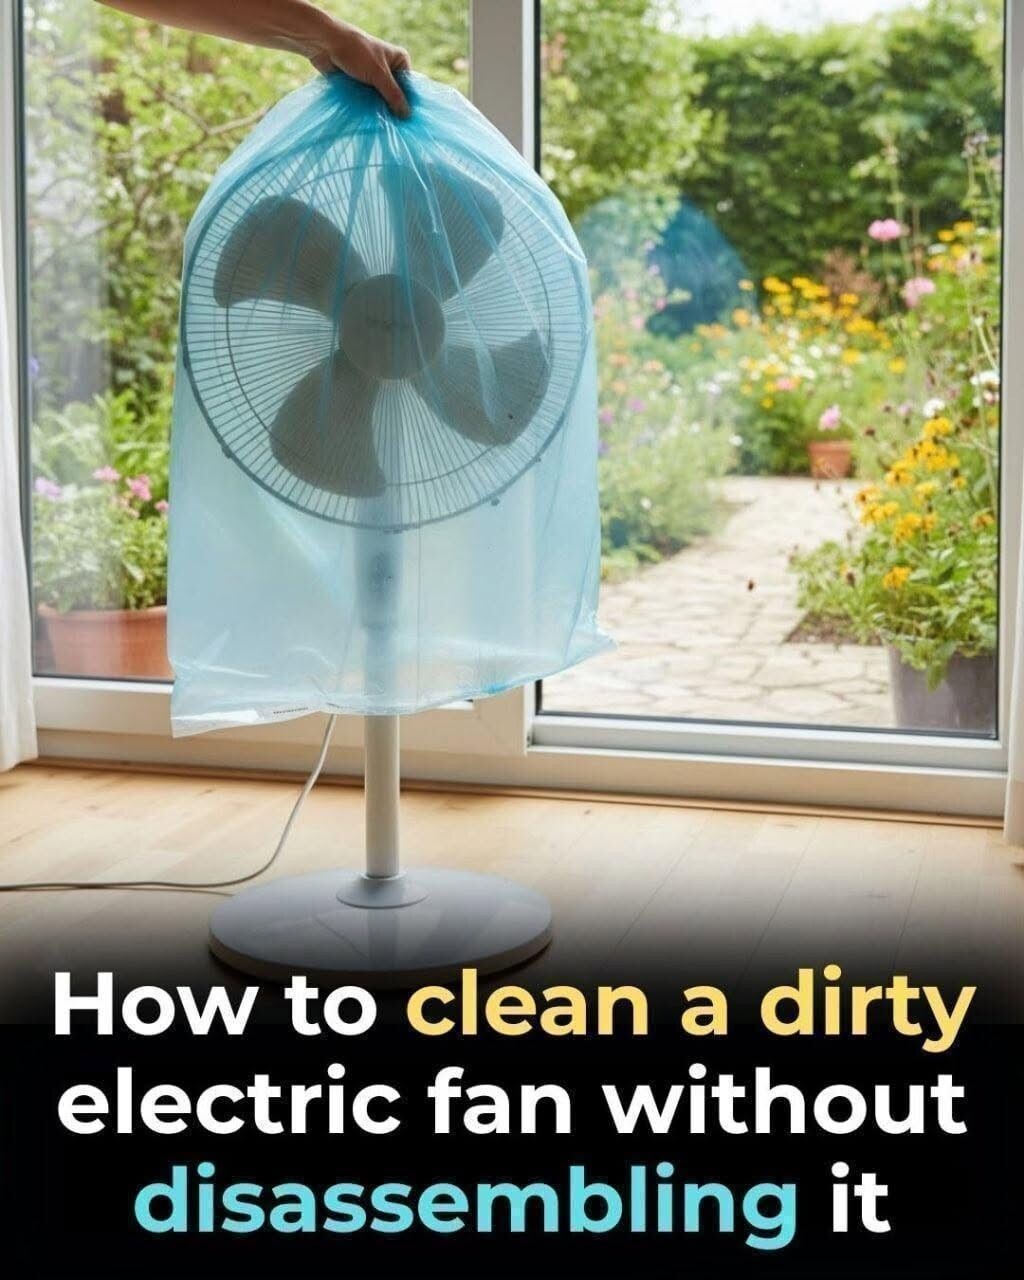
As warm weather approaches, standing fans and desk fans become essential household appliances. However, after months of storage or continuous use, electric fans accumulate thick layers of dust, pet dander, pollen, and debris across their blades and protective cages. Running a filthy fan does more than just circulate stale air—it actively blows microscopic allergens around your living space, triggering respiratory issues and reducing indoor air quality.
Taking apart a standing fan to clean every individual blade, screw, and safety grill is notoriously tedious and time-consuming. Many people put off the chore simply to avoid dealing with complicated plastic clips, tiny screws, and tedious scrubbing. Fortunately, a clever viral cleaning hack uses common household items to clean your fan thoroughly in minutes without requiring any disassembly.
This guide breaks down the complete process, explores the science of household dust accumulation, covers essential maintenance practices, and shares practical home care tips to keep your appliances running efficiently year-round.
Why Dust Accumulates Fast on Fan Blades
Understanding why fans gather so much dirt helps prevent build-up before it starts. Even in seemingly clean homes, standing fans act as powerful magnet systems for airborne debris.
Static Electricity and Blade Friction
When fan blades spin rapidly through the air, friction generates a continuous electrostatic charge along the plastic or metal edges. Static electricity acts like a magnet, pulling floating dust particles, pet hair, and microscopic textile fibers toward the blades. Once the initial layer sticks, subsequent dust clings even faster, forming a dense gray blanket over time.
Humidity and Household Grease
In kitchens, living rooms, and bedrooms, ambient humidity combines with microscopic airborne oils from cooking, skin shedding, and scented candles. This sticky film coats the cage guard and fan blades. When dust settles onto this oily layer, it creates a stubborn, caked-on grime that ordinary dry dusting cannot remove.
Health Risks of Running a Dirty Fan
Operating a dust-covered electric fan presents several subtle health and home hazards:
-
Allergy Triggers: Circulating dust mites, pollen, and mold spores worsens asthma, sinus congestion, and seasonal allergies.
-
Overheating Motors: Dust accumulation inside the rear motor housing increases friction and restricts airflow, leading to potential motor strain or electrical hazard.
-
Higher Energy Bills: A clogged motor works harder to spin blades, consuming more electricity over prolonged periods.
-
Shorter Appliance Lifespan: Excess strain reduces motor efficiency, forcing you to invest in a replacement far sooner than necessary.
The Trash Bag Spray Trick: Step-by-Step Instructions
This viral cleaning method uses a simple non-rinse cleaning solution combined with kinetic force inside a plastic bag to trap and remove dust instantly without taking the cage apart.
       [ CLEANING SOLUTION RECIPE ]
+----------------------------------------+
|  1 Cup Warm Water                      |
|  2 tbsp Baking Soda (Degreaser)        |
|  1 tbsp Liquid Dish Soap (Surfactant)  |
|  1 tbsp White Vinegar (Sanitizer)      |
+----------------------------------------+
Ingredients and Materials Needed
Before beginning, gather these inexpensive materials:
-
1 large, clean plastic trash bag (preferably 13 to 30 gallons, transparent or lightweight)
-
1 spray bottle
-
1 cup warm water
-
2 tablespoons baking soda
-
1 tablespoon liquid dish soap
-
1 tablespoon white vinegar (optional, for extra deodorizing)
-
A microfiber cloth or dry towel
Step 1: Safety First — Disconnect Power
Safety is non-negotiable whenever you clean electrical appliances. Turn off the fan and completely unplug the power cord from the wall outlet. Never spray liquid near electrical outlets, power cords, or the rear motor assembly housing.
Step 2: Mix the Non-Rinse Cleaning Solution
In your spray bottle, combine the warm water, baking soda, dish soap, and vinegar. Swirl gentle circles to dissolve the baking soda completely without producing excessive foam.
-
Dish Soap: Acts as a surfactant to break down oils and grease clinging to the plastic blades.
-
Baking Soda: Provides mild abrasive cleaning power without scratching surfaces and neutralizes odors.
-
Vinegar: Cuts through grime and sanitizes the fan surfaces naturally.
Step 3: Spray the Fan Blades and Cage Guard
Hold the spray bottle 6 to 8 inches away from the fan cage. Lightly mist the outer wire grill, ensuring the spray penetrates through the openings to coat the interior fan blades.
Important Caution: Focus your misting strictly on the front grill and internal fan blades. Do NOT spray the rear motor housing where the electrical wiring sits.
Step 4: Cover the Fan Head with the Trash Bag
Take a large plastic garbage bag and slip it completely over the top head of the fan, wrapping it tightly around the entire cage enclosure. Pull the open end of the bag snugly around the neck stem just below the blade housing, holding it firmly closed with your hand to form a sealed chamber.
Step 5: Run the Fan for 3 to 5 Minutes
Plug the electric fan back into the wall outlet while maintaining a firm hold on the bottom opening of the trash bag. Turn the fan setting to its highest speed.
As the blades spin rapidly within the enclosed bag, the centrifugal force hurls the loosened dust, soap mist, and debris outward off the blades. The plastic bag catches every drop of moisture and trapped dirt, preventing any mess from blowing onto your floors or furniture.
Step 6: Remove Bag and Wipe Excess Moisture
After 3 to 5 minutes, turn the fan off and unplug it once more. Carefully slide the trash bag off the head, keeping the accumulated dirty liquid trapped at the bottom of the bag. Use a clean microfiber cloth to wipe down any remaining moisture on the outer wire frame. Allow the unit to air dry completely for 10 minutes before regular use.
Alternative No-Disassembly Cleaning Methods
If you prefer dry cleaning techniques or do not have a large plastic bag handy, several alternative methods yield great results.
+---------------------+-----------------------------------+----------------------------------+
| Cleaning Method     | Best Used For                     | Key Advantage                    |
+---------------------+-----------------------------------+----------------------------------+
| Trash Bag Method    | Caked-on grease & heavy dust      | Deep clean; zero disassembly     |
| Compressed Air      | Light surface dust & fine lint    | Fast, completely dry process     |
| Vacuum Brush        | Maintenance cleaning (weekly)     | Dust captured instantly at source|
| Hair Dryer (Cool)   | Quick pre-season prep             | Uses common household items      |
+---------------------+-----------------------------------+----------------------------------+
Method 1: Compressed Air Canisters
Air canisters designed for electronics repair offer an ultra-fast dry cleaning solution:
-
Take the unplugged fan outdoors or to a balcony.
-
Direct the nozzle tube toward the back of the fan blades through the wire grill.
-
Use short bursts of compressed air to blast away stubborn lint and dust layers starting from top to bottom.
Method 2: Vacuum Cleaner Attachment
Using a vacuum cleaner with a dusting brush attachment keeps airborne mess to a minimum:
-
Attach the soft bristle brush tool to your vacuum hose.
-
Turn the vacuum on high suction and run the brush along the exterior wire cage slots.
-
Gently press the bristles through the cage to reach blade edges, sucking away loose dust clusters instantly.
Essential Home Appliance Safety & Energy Tips
Maintaining household appliances effectively saves money on utility bills, reduces repair costs, and enhances home comfort.
Protecting Appliance Investment and Warranties
Regular preventive maintenance protects your home equipment investment. Keeping appliances free from debris reduces wear on mechanical components, preventing costly technician visits or premature replacements. Always check manufacturer guidelines before applying wet solutions to ensure compliance with product warranties.
Improving Home Energy Efficiency
Clean fans run cooler and draw less wattage than dirty units struggling against blade drag and clogged air vents. Pair electric standing fans with central air conditioning to improve cool air distribution across rooms. This simple step allows you to set your thermostat higher in summer, cutting overall energy expenses significantly.
Upgrading Home Health and Environmental Care
Maintaining clean air circulators is a vital component of holistic home environmental health. Combining regular fan cleaning with furnace air filter replacements and room purifiers lowers indoor pollutant levels, protecting family health and creating a fresher, cleaner living space.
Interesting Facts About Fans and Dust
-
Ancient Cooling: Before electric motors were invented in the late 1880s, hand fans made of feathers, paper, and palm leaves were used across ancient Egypt, China, and Rome.
-
Dust Composition: Up to 80% of typical indoor household dust consists of dead human skin cells, pet dander, micro-textile fibers, and outdoor soil brought in on shoes.
-
Wind Chill Effect: Fans cool people, not rooms. Fans do not lower air temperature; they create a wind-chill effect on human skin by evaporating perspiration faster.
-
The First Electric Fan: Schuyler Skaats Wheeler invented the two-blades electric desktop fan in 1882 at the age of 22.
Conclusion
Keeping your electric fan spotless does not require tedious disassembly or spending hours removing tiny screws. The plastic trash bag and non-rinse spray method provides a clever, efficient, and mess-free shortcut to restore full airflow, clear out harmful allergens, and extend the operating life of your appliance. Incorporate this easy maintenance routine into your seasonal deep-cleaning schedule to enjoy crisp, clean air and lower energy bills all summer long.
Frequently Asked Questions (FAQ)
Is it safe to spray liquid on an electric fan?
Yes, as long as you mist only the front plastic blades and outer cage frame while the unit is completely unplugged. Never spray liquid into or near the rear motor housing or electrical controls.
How often should I clean my standing fan?
During peak summer usage, clean your fan every 2 to 3 weeks to prevent heavy dust accumulation. If you have pets or suffer from indoor allergies, weekly quick maintenance with a vacuum brush attachment is recommended.
Why is my fan still noisy after cleaning?
If cleaning the blades does not fix a noisy fan, the cause may be unlubricated motor bearings, loose screws on the casing, or bent fan blades creating an unbalanced spin.
Can I use this bag cleaning trick on ceiling fans?
This specific centrifugal trash bag method works best on portable standing fans and desk fans. For ceiling fans, use a damp pillowcase slipped over each blade to wipe off dust without dropping debris onto furniture below.
